
Required materials:
- LattePanda 3 Delta (https://amzn.to/3R3TW8K* or https://www.lattepanda.com/lattepanda-3-delta)
- Top and bottom of the case
- can be downloaded here:
- Bottom side: LattePanda3DeltaCaseBottom v1.stl (55 kB)
- Top side: LattePanda3DeltaCaseTop v1.stl (68 kB)
- can be downloaded here:
- 4x standoff M3 15 mm, for example from the assortment: https://amzn.to/3kKtRzK*
- 4x screws M3, 5 mm long (are already included in the assortment of spacers)
- 4x screws M3, 16 mm long
- 4x screws M4, 12 mm long
- 4x nuts for M4 screws
- the above-mentioned screws and nuts are included in this assortment, for example: https://amzn.to/3ZUwK0V*
- Cooler 80 x 80 x 25mm, 5V (for example https://amzn.to/3WKFQLt* )
- Adapter cable fan to VGA fan, for example: https://amzn.to/3Z7XQ48*
* Amazon Affiliate Link, if you buy something through it, I get a small commission, the price does not change.

The tops and bottoms have to be printed out accordingly.
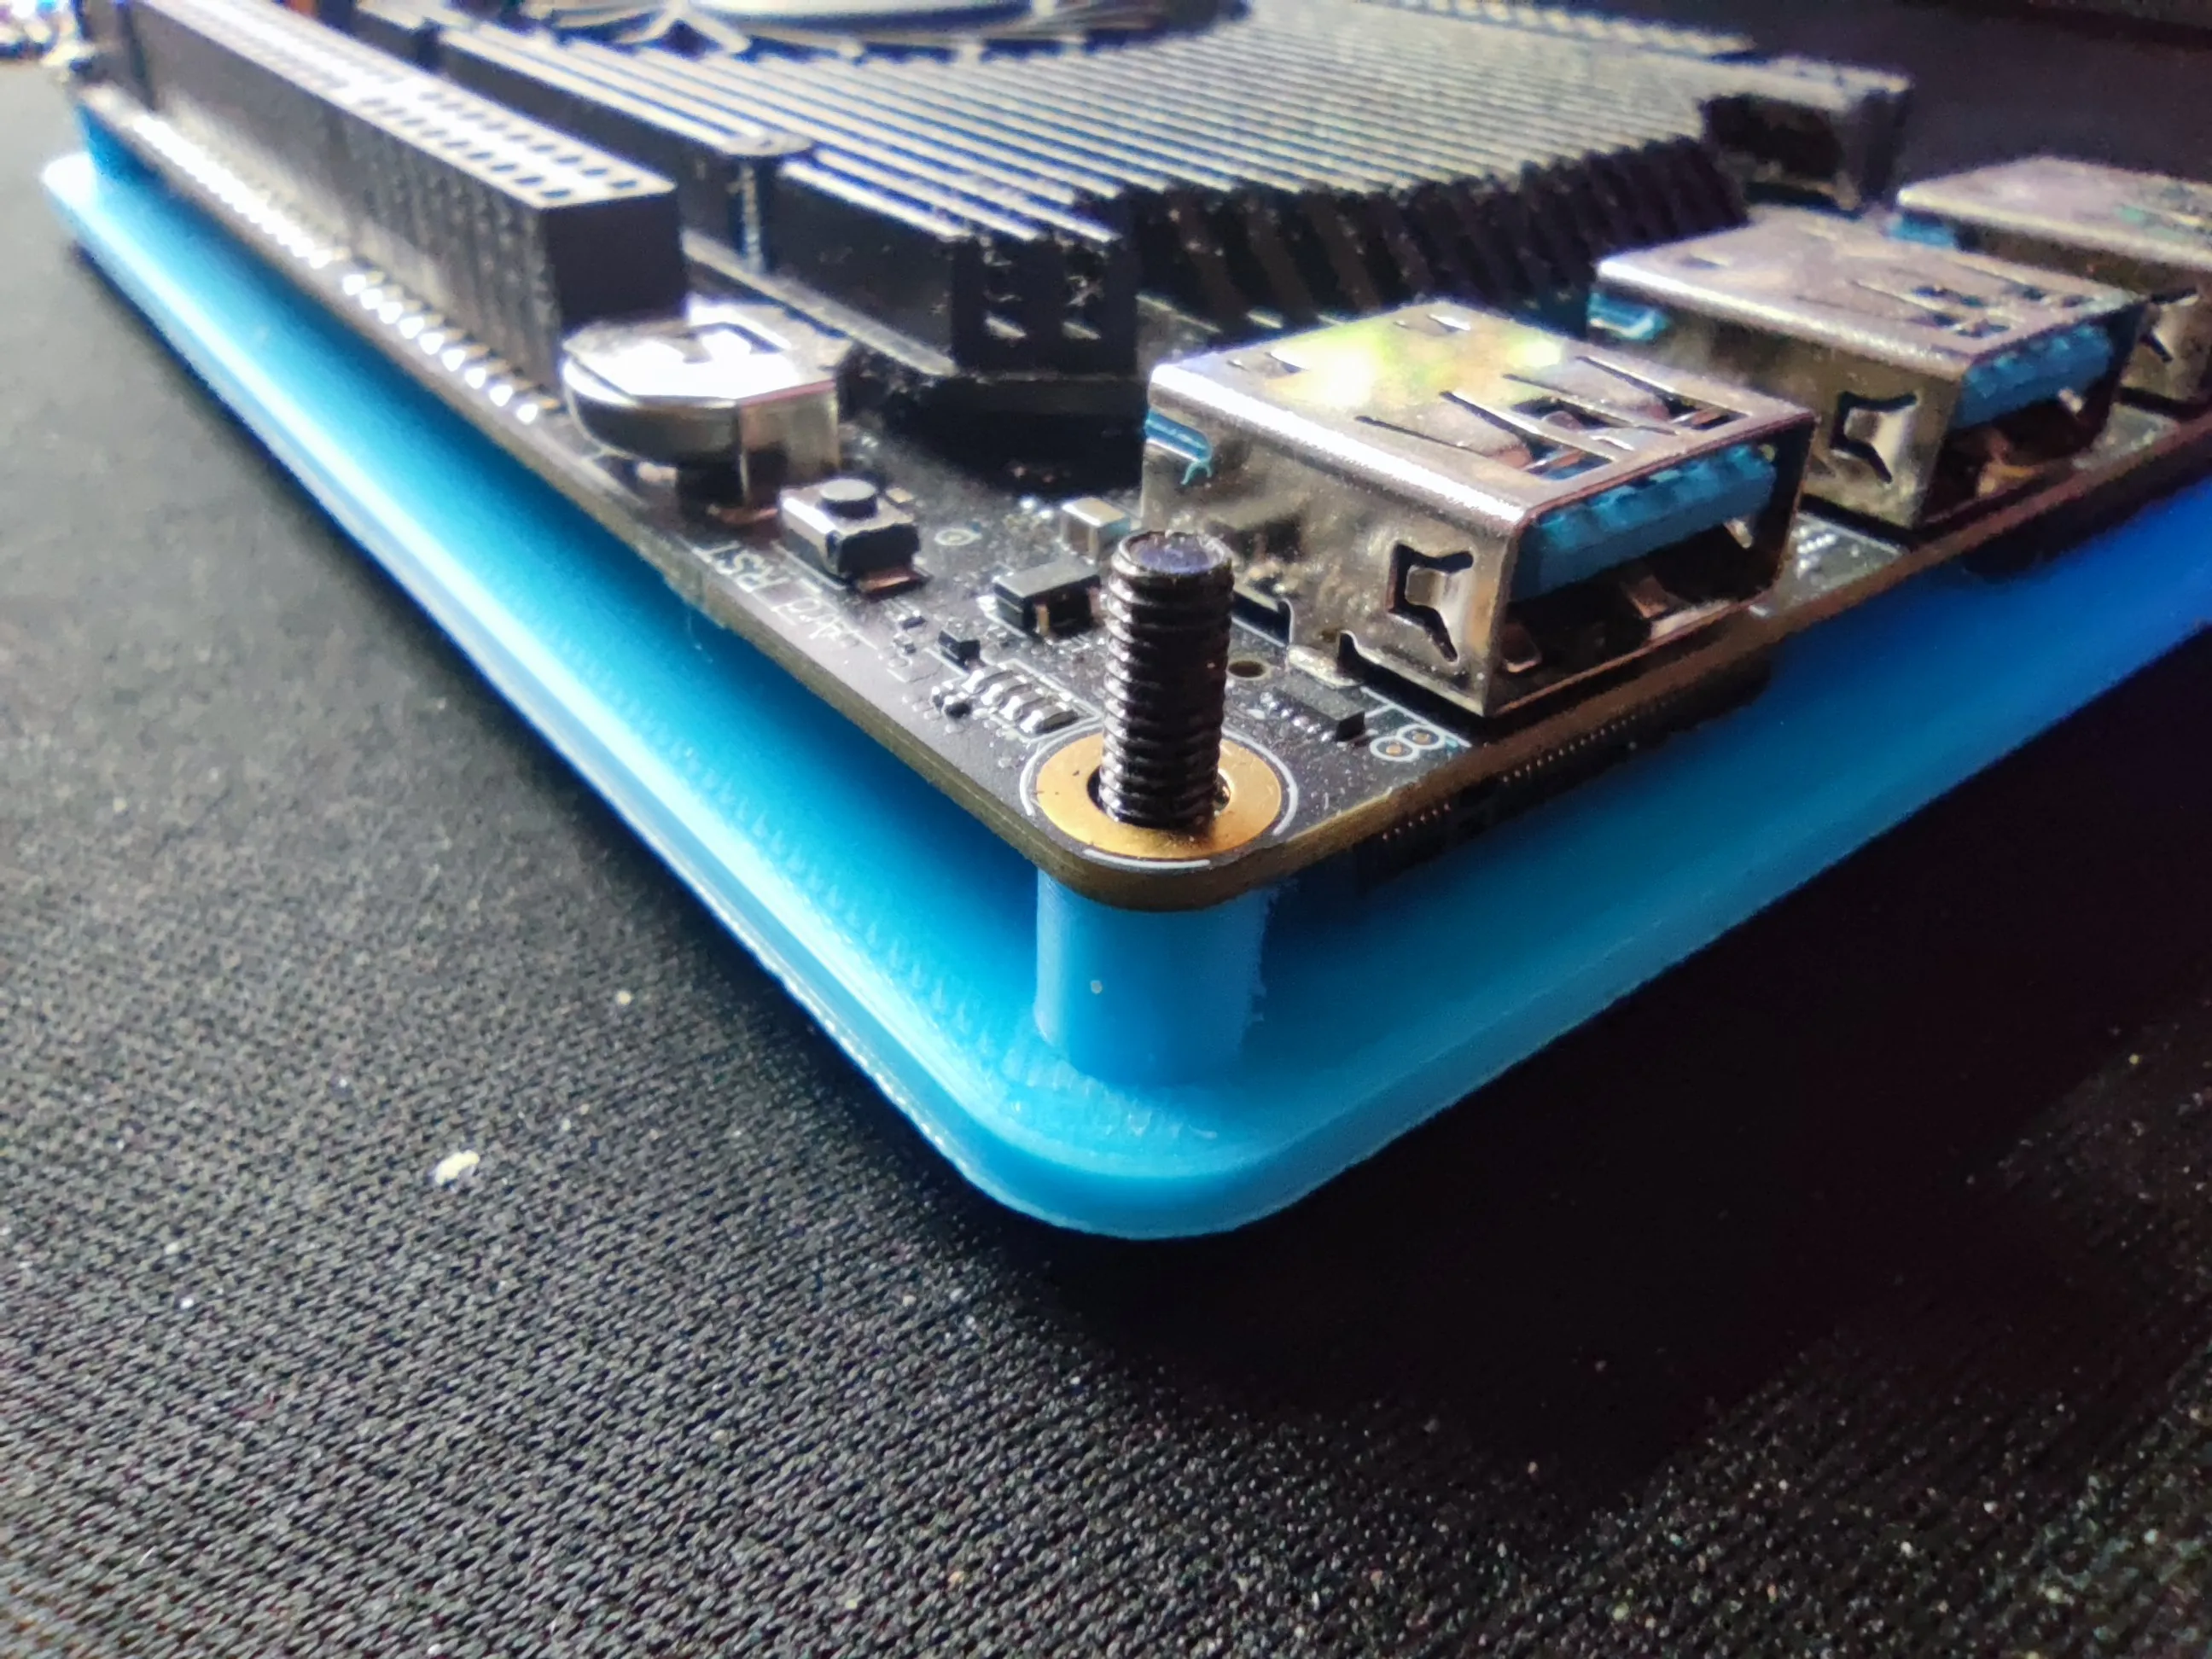
Then screw the 4 16 mm M3 screws into the bottom of the case and position the PCB directly on top.
The board can then be secured with the 4 standoffs.

Then you can remove the cover of the originally installed fan, simply unscrew the following 4 screws (marked red):

The cover can then be lifted carefully. The fan can remain mounted as desired, we only need the heat sink itself.
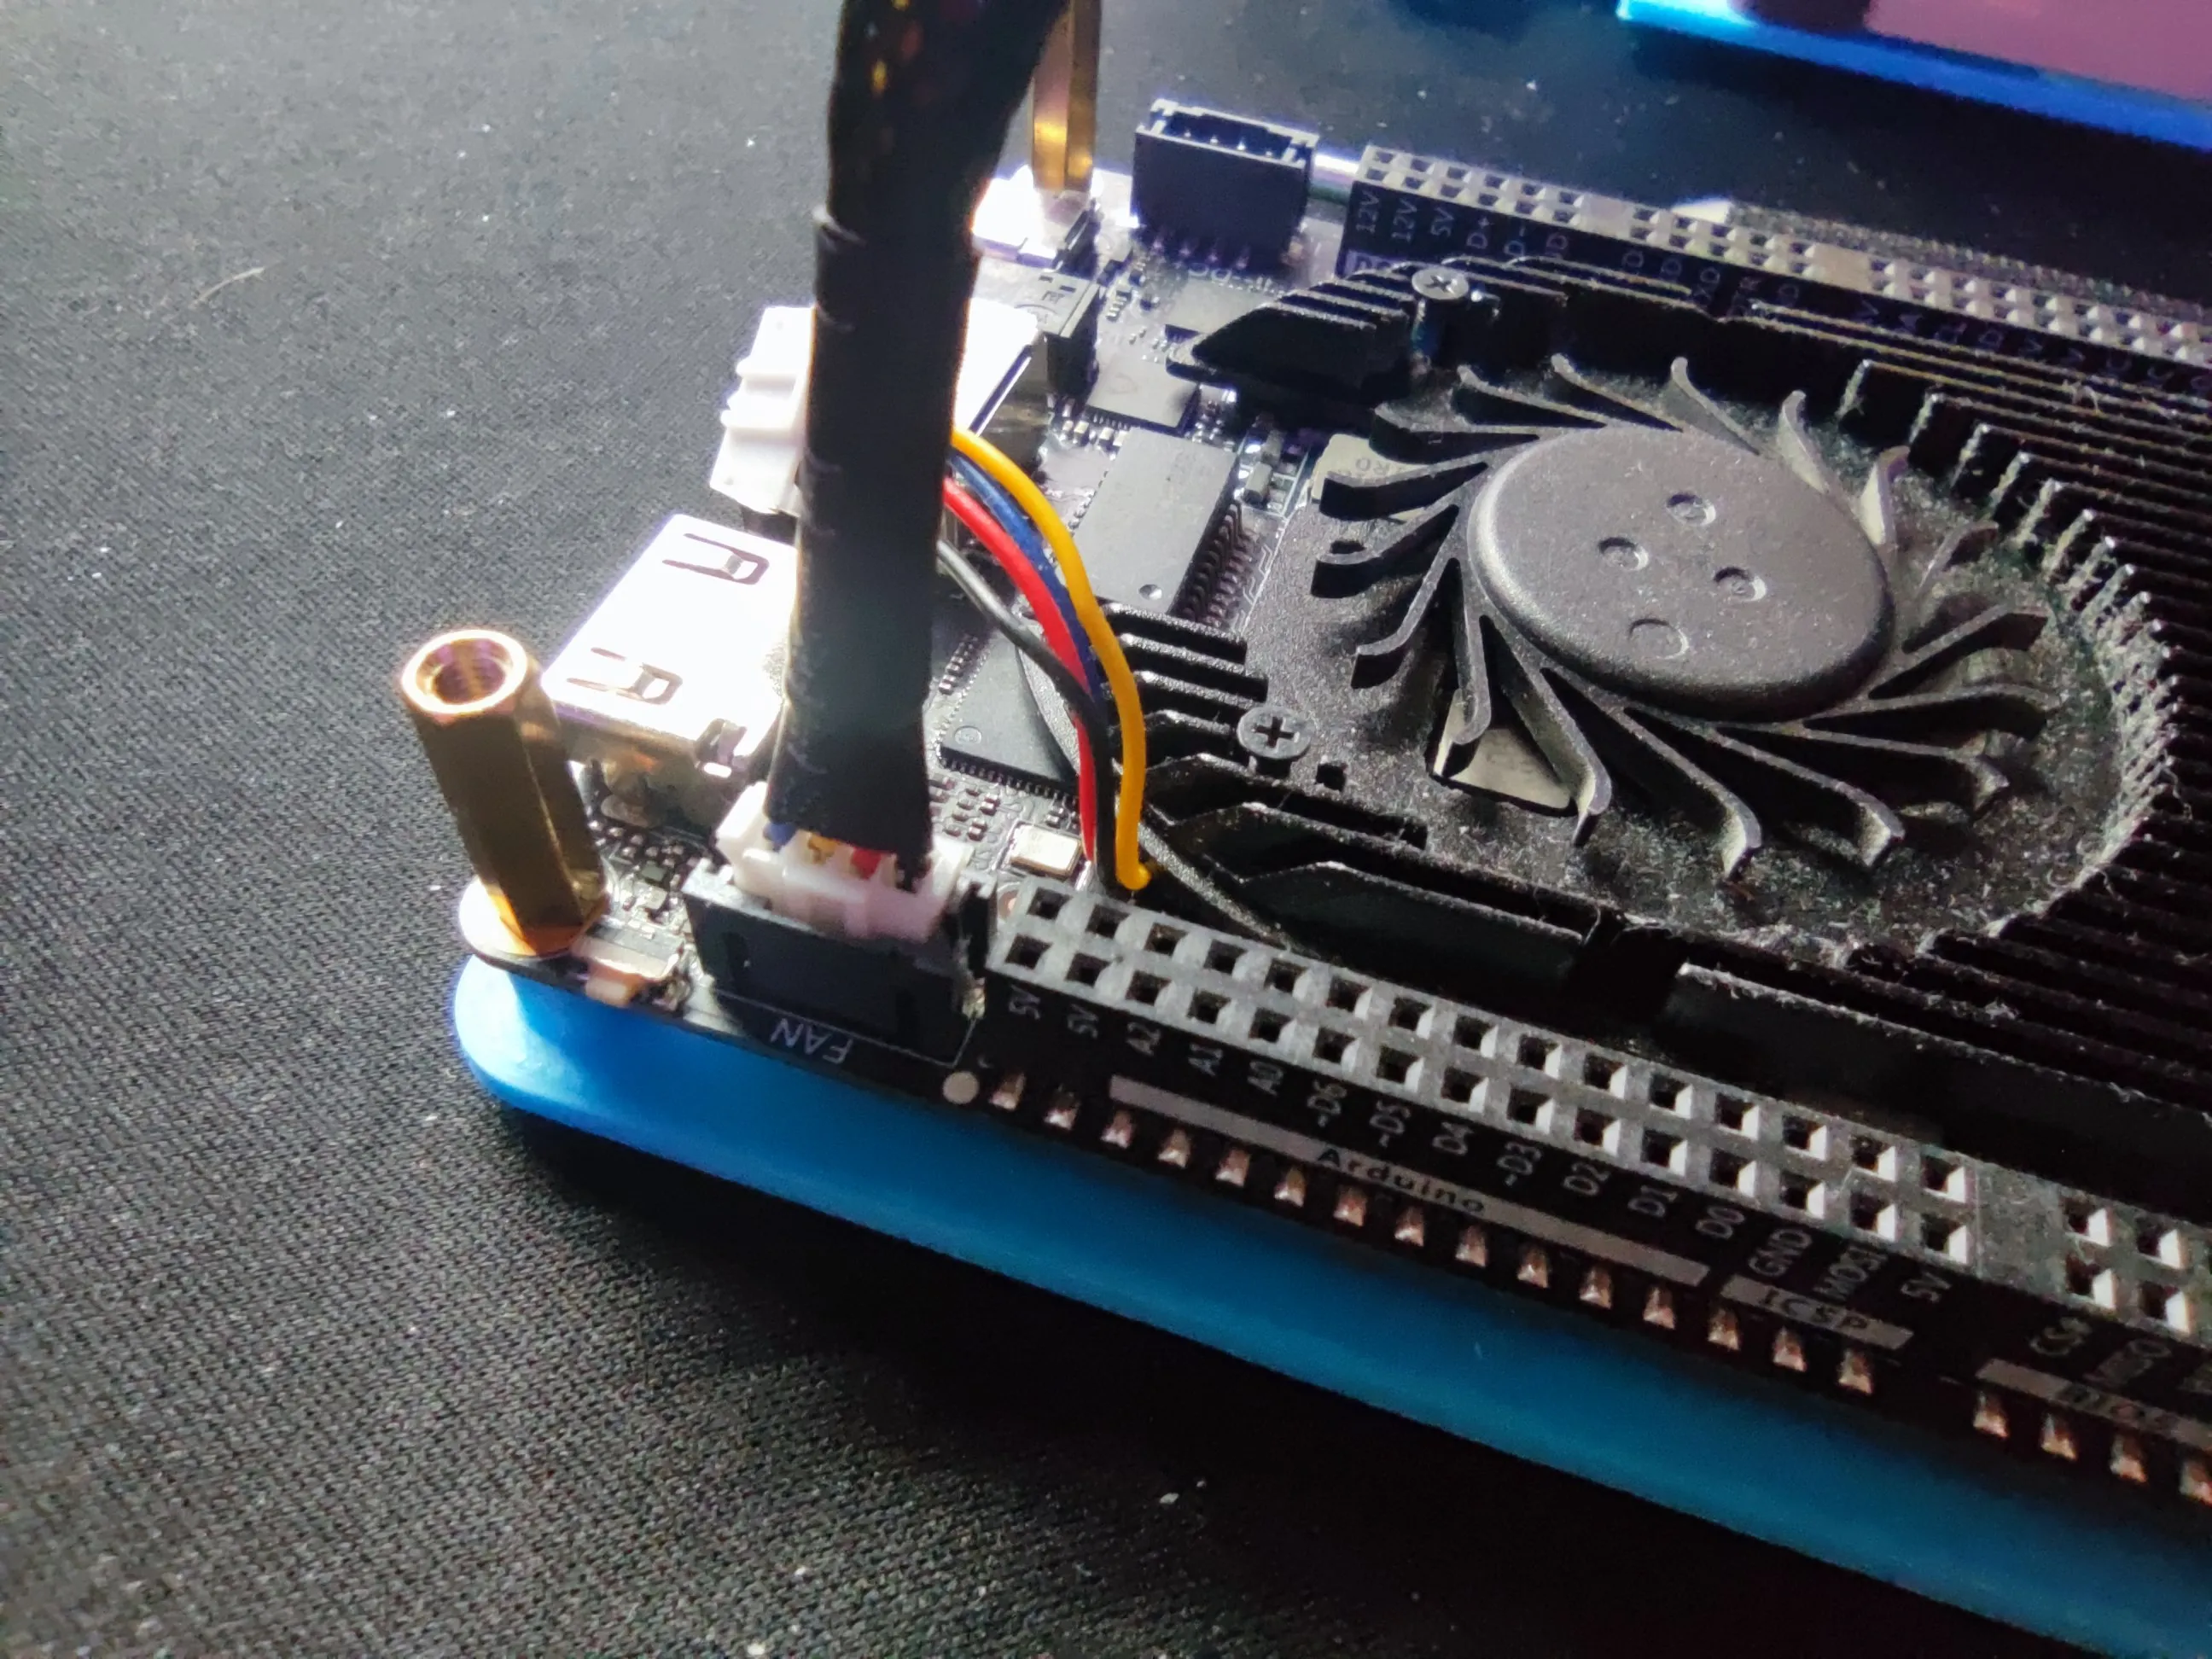
Finally, the existing fan cable must be pulled out of the socket (marked yellow).
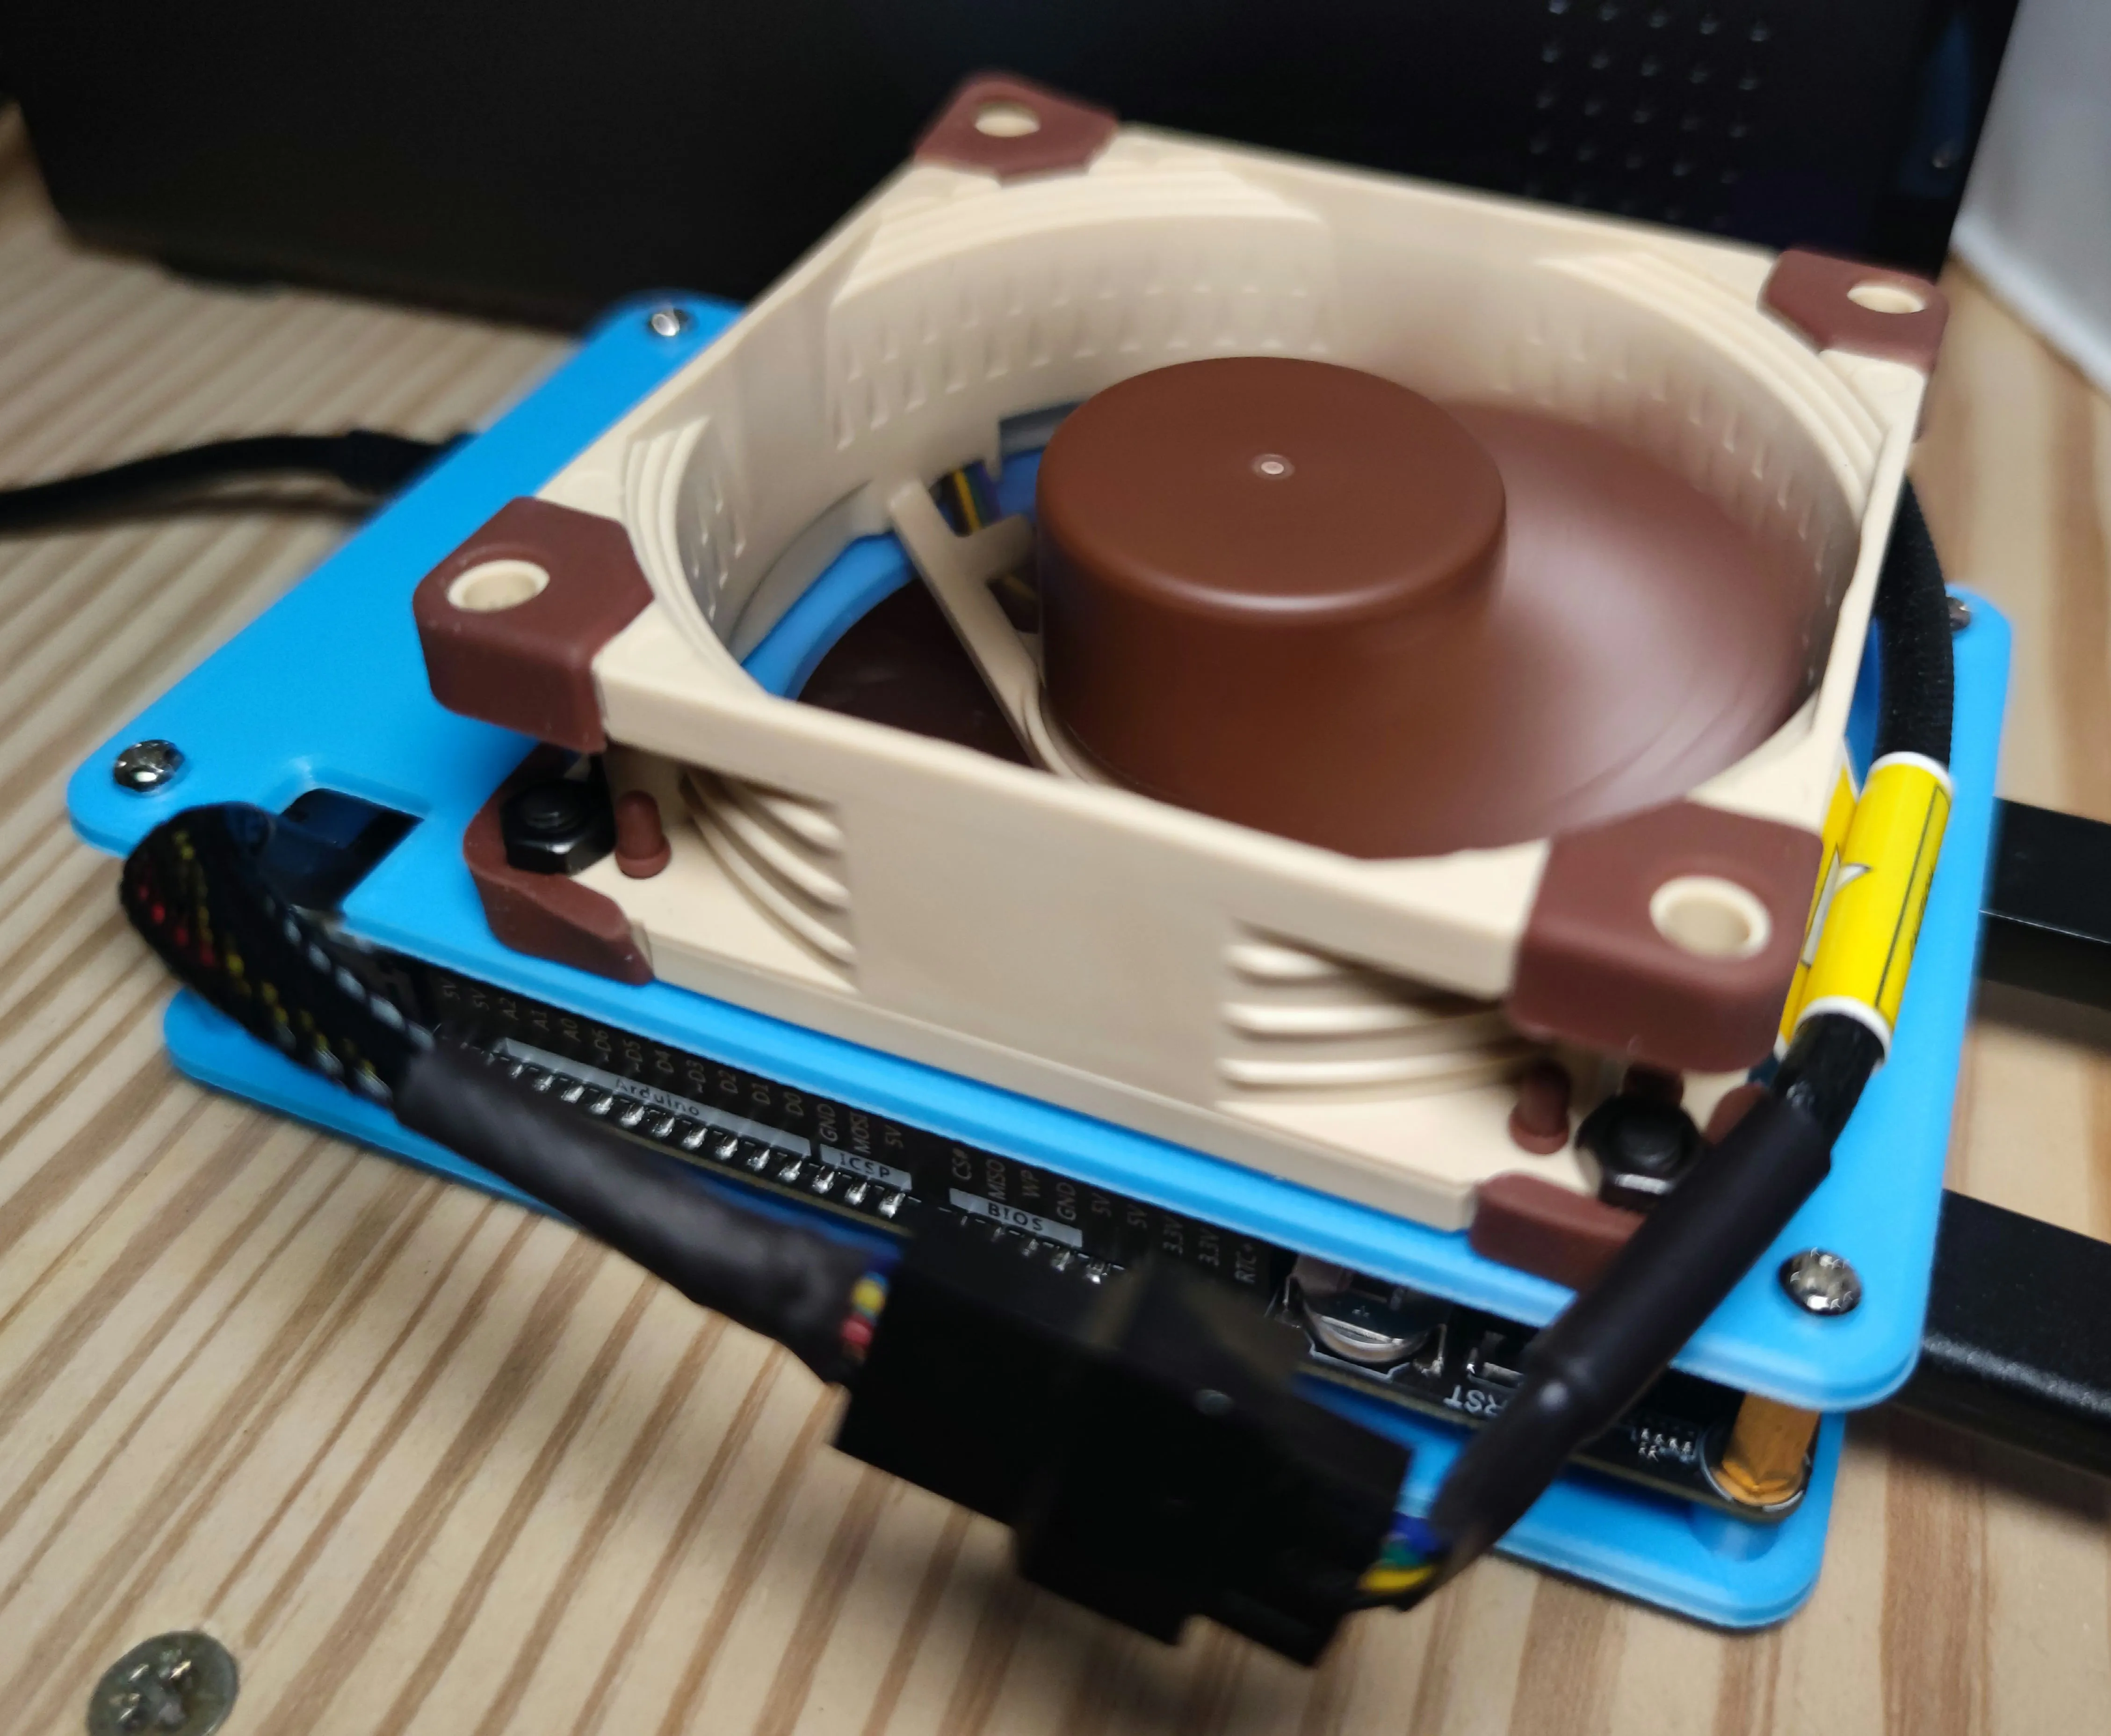
The next step is to mount the new fan on the top of the case. To do this, simply use the 4 12mm long M4 screws and nuts:

Make sure that the fan is oriented correctly, as can be seen here by the arrows. You may also want to make sure that the cable is well positioned so that you don't have a lot of cable hanging in the air.
The cable from the fan is then connected to the adapter cable and this is then connected to the "fan" port on the LattePanda:

Finally, the top is attached to the spacers with the 4 5mm M3 screws.
Questions or comments?